
Masonry Balancing Act
The shell team builds the second-floor masonry walls from 20 feet high.
While similar to the first-floor masonry walls covered in Episode 2, this build has several unique challenges.
Read on to see the similarities & differences between constructing masonry walls at grade and from above.
Look back:
first floor masonry
Many of the basic topics for the second-floor masonry are covered in our episode on the first-floor masonry construction. Take a look at some of the concepts covered in Episode 2:


Block Is Delivered
Masonry block is ordered & delivered to the job site.
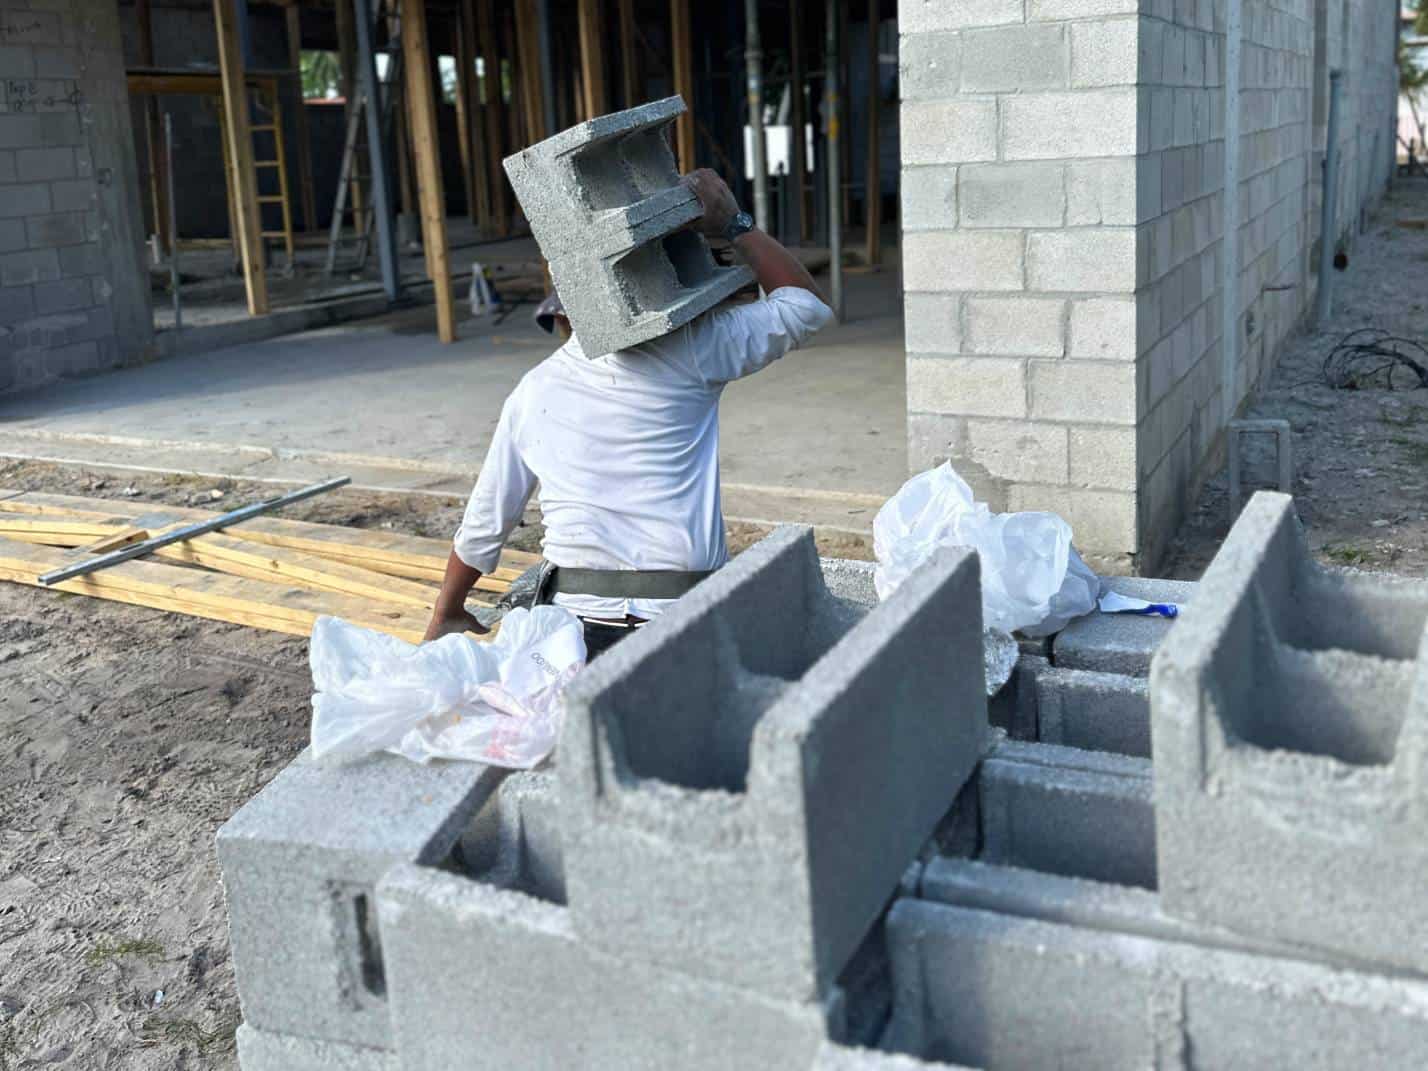
It has to get to the second floor though which takes special effort.
The newly formed floor trusses need to be reinforced, and a crane has to be brought in to hoist the block to the second floor to be installed.
There’s a unique block here in these pallets – bond beam. That is explained in the close-up below.
Watch the video below for live action of al this taking place.

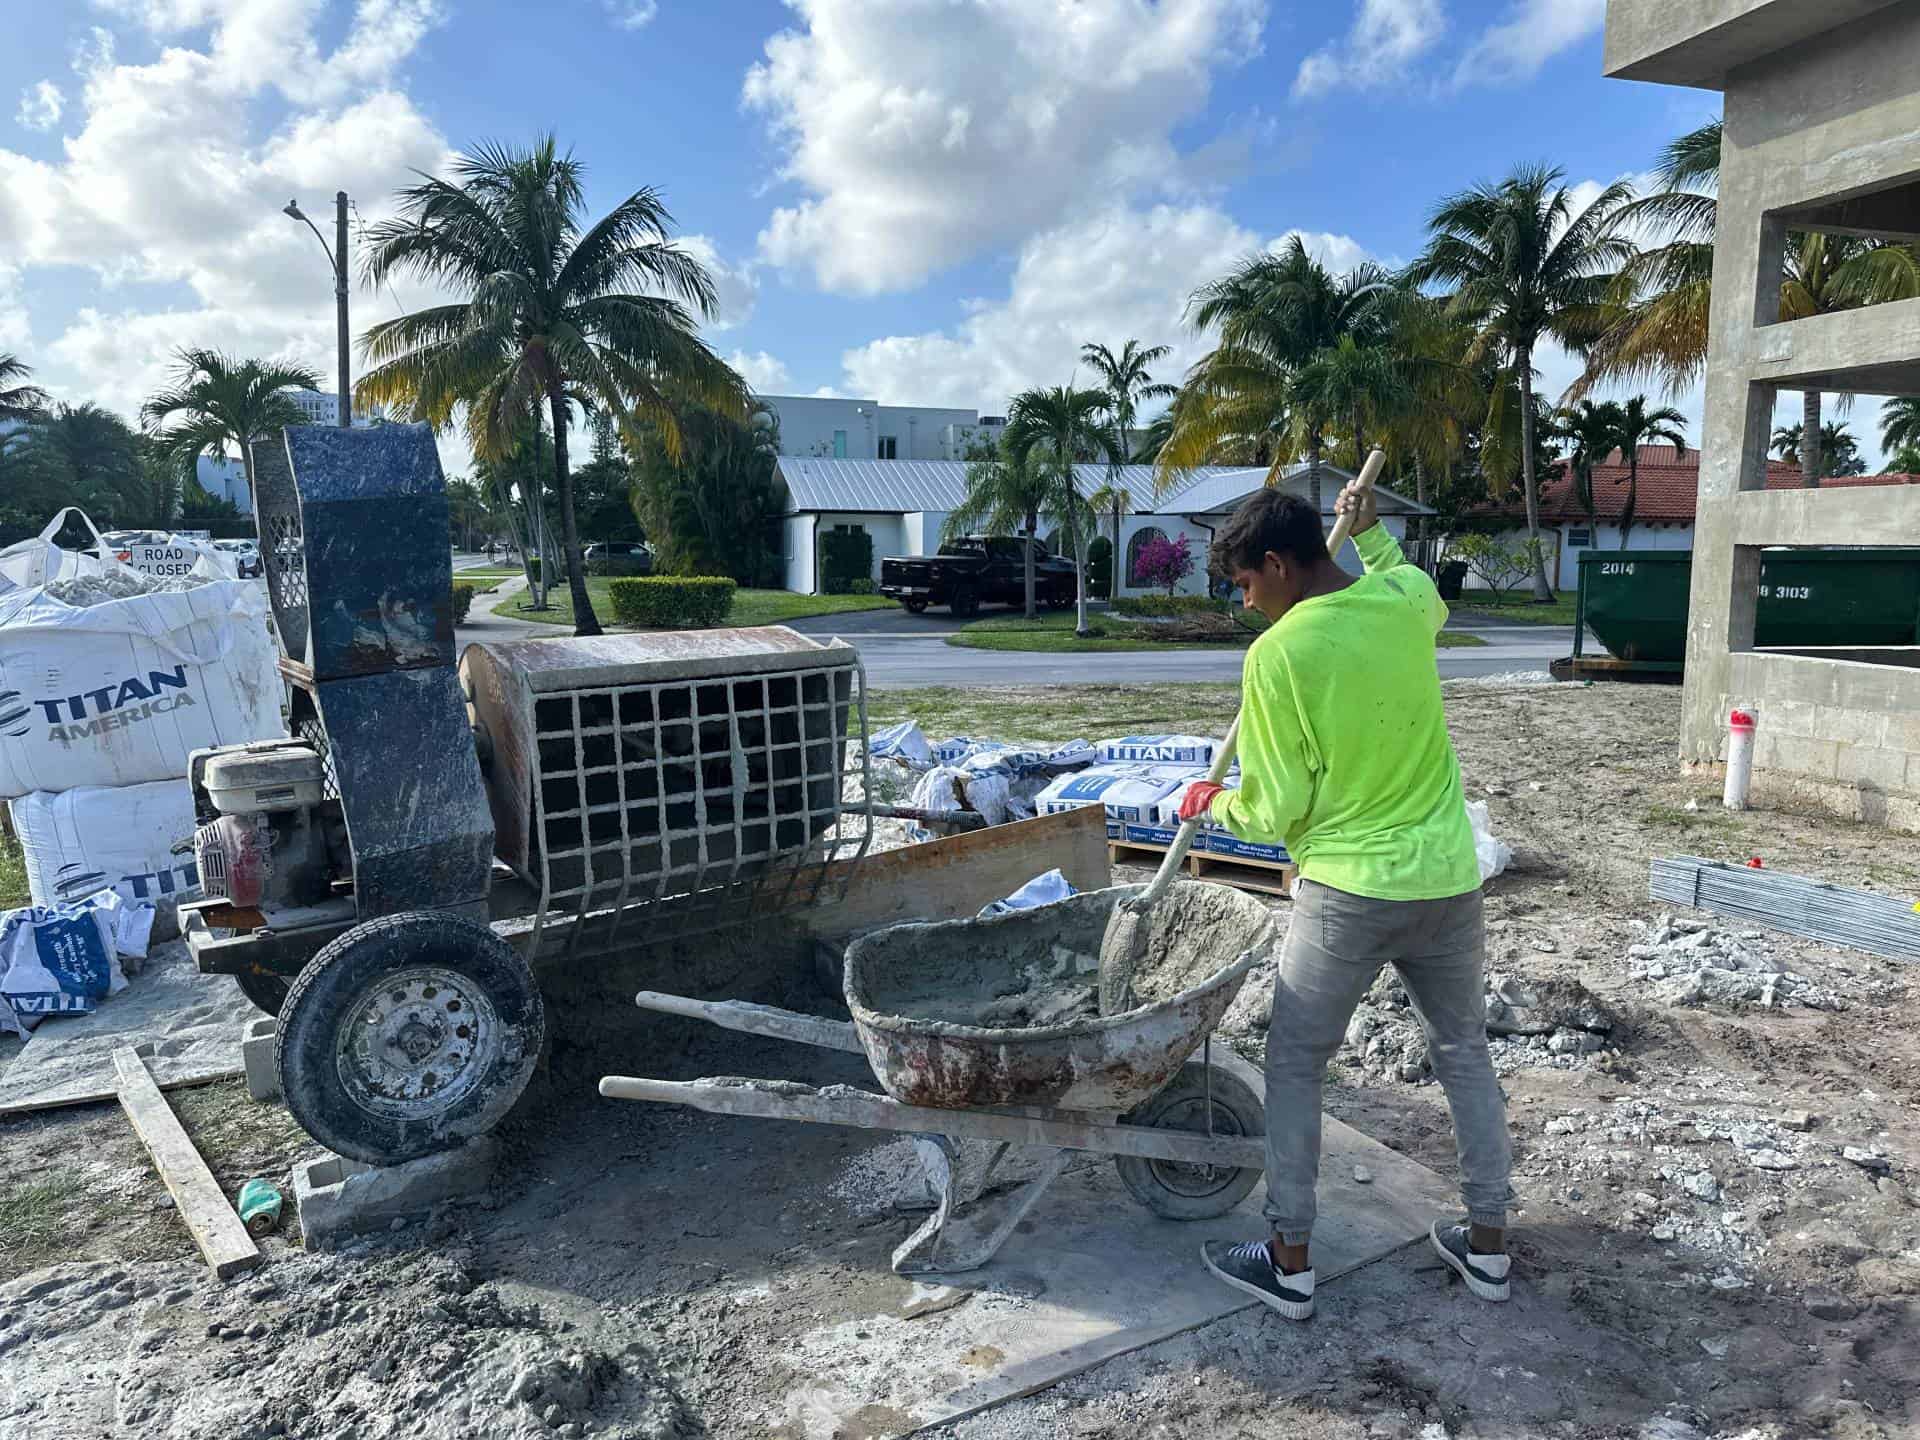
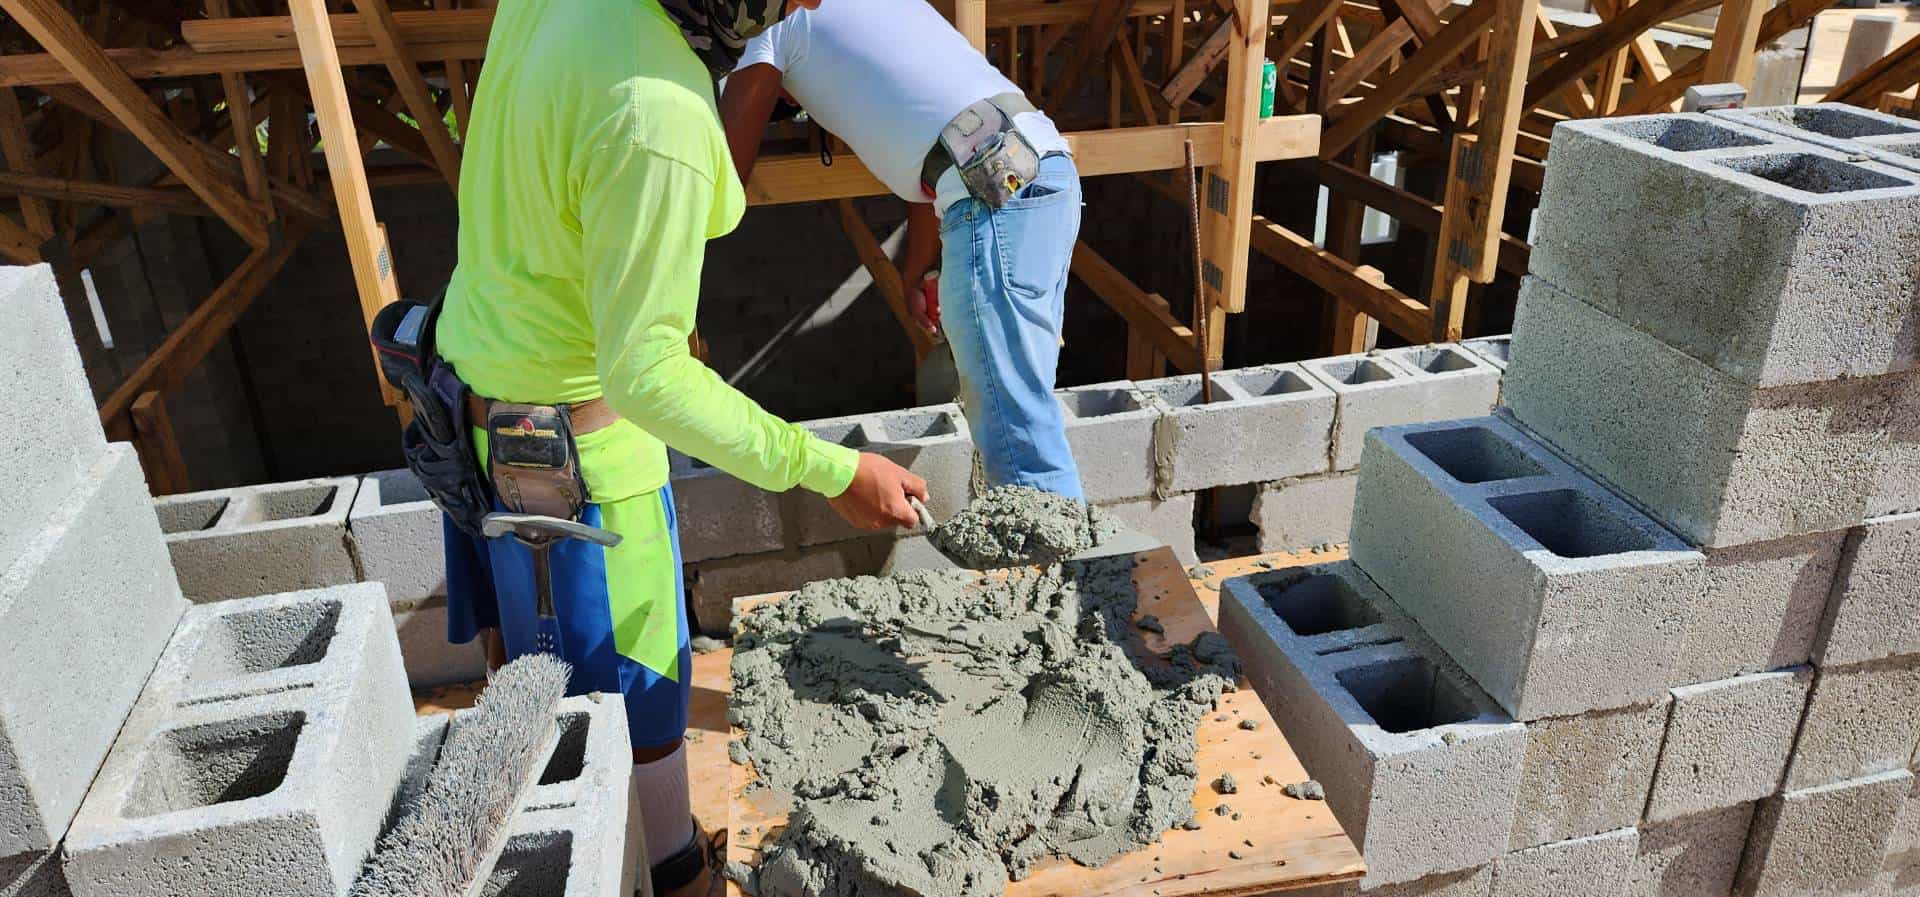
Masonry Concrete Is Mixed On-Site
As the block is being laid from above, the ground team prepares & mixes the Type M cement with sand & water to be placed between the block.
The sand is delivered in large sacks that you can see in the distance of the photo. The video below shows this in action.
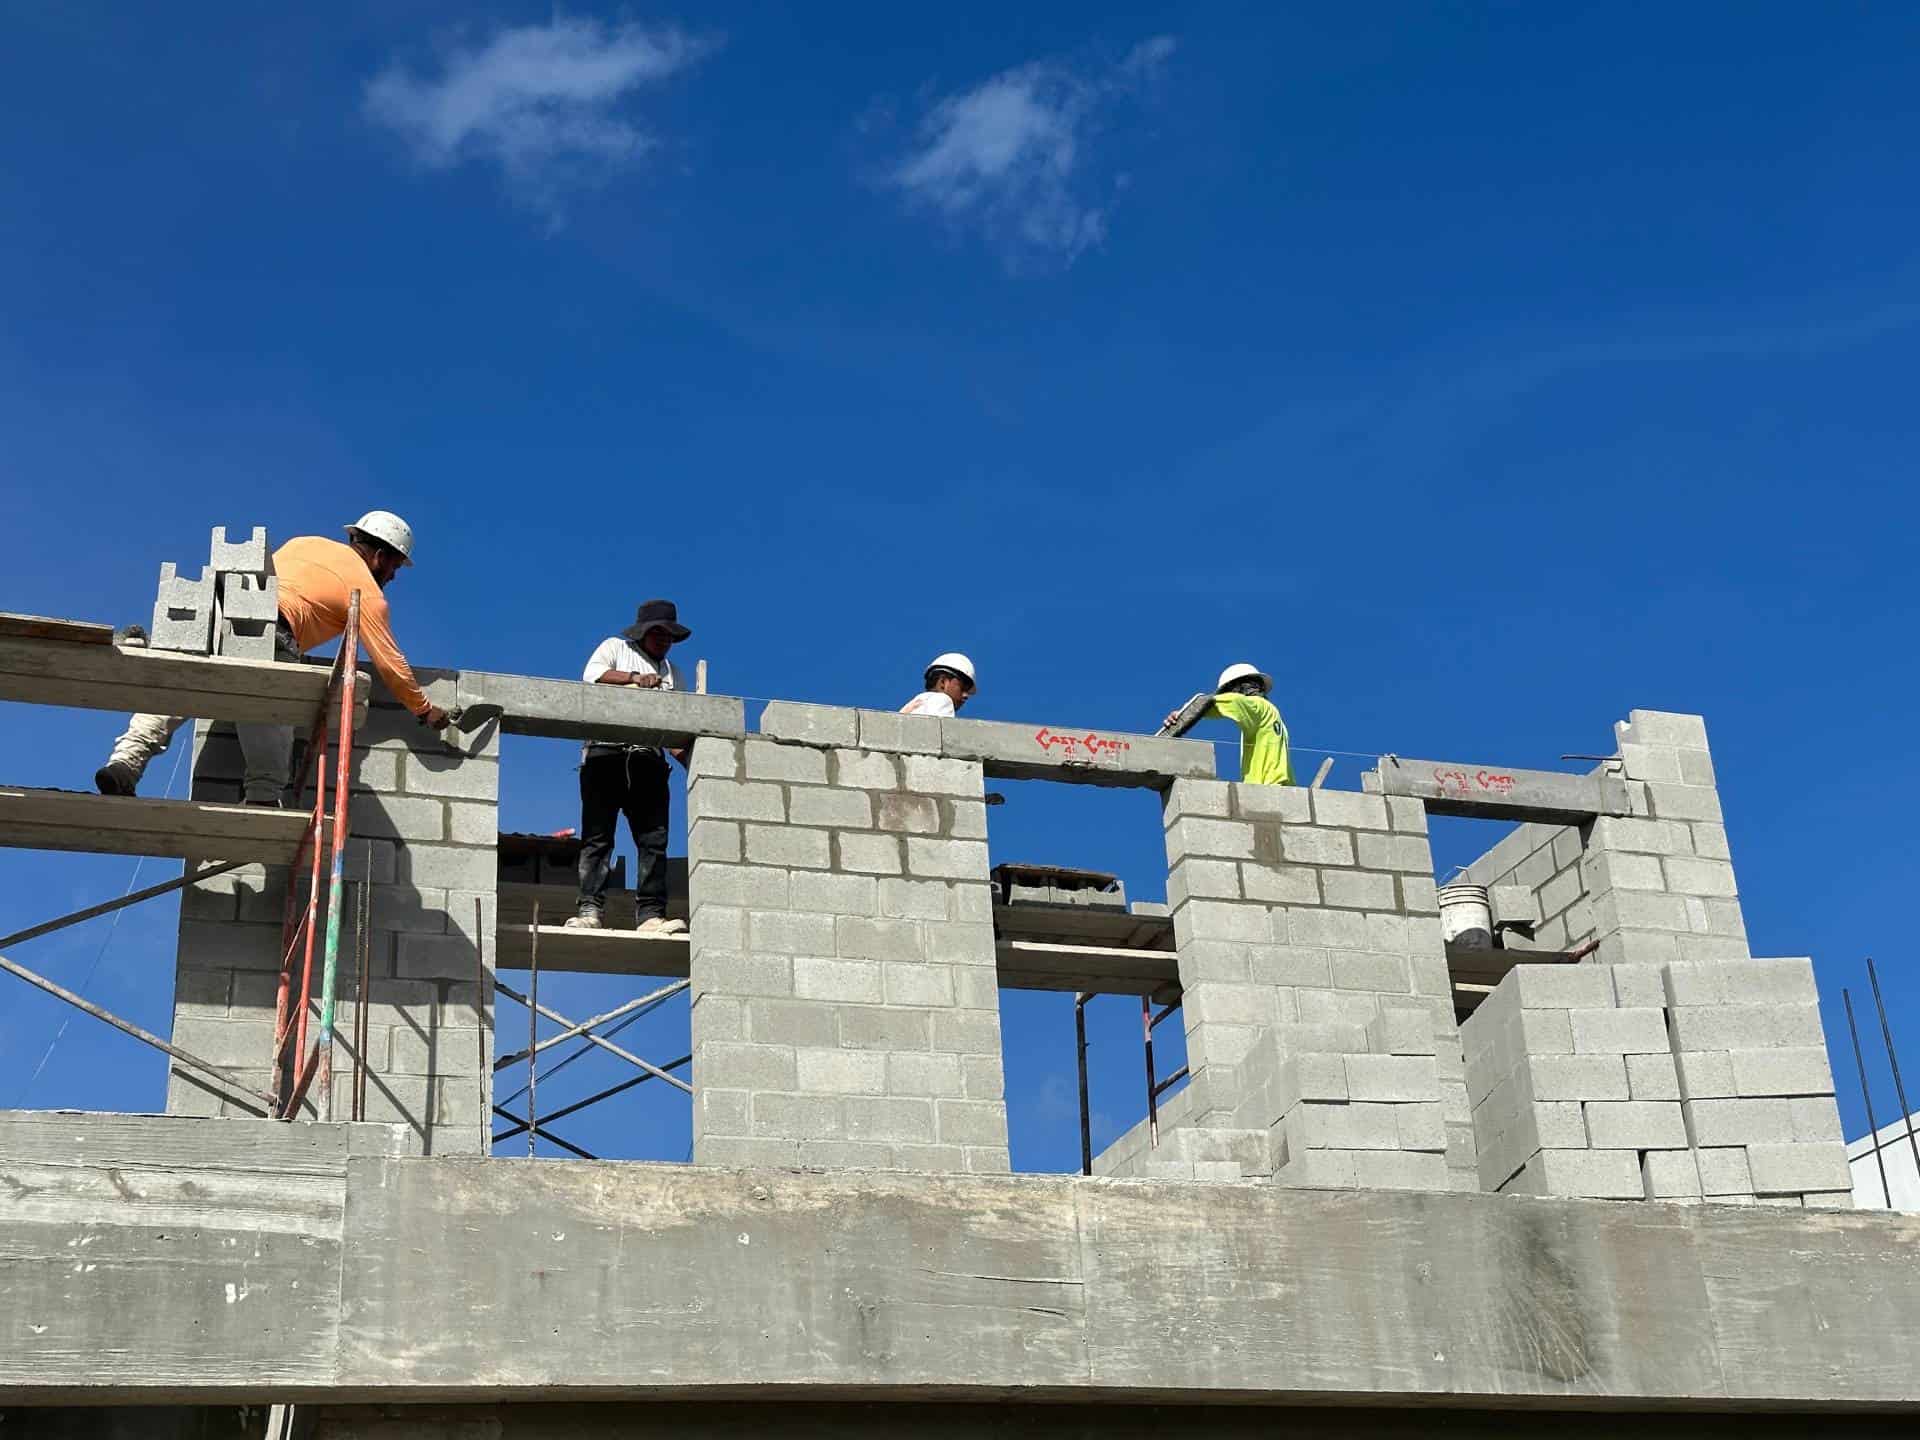
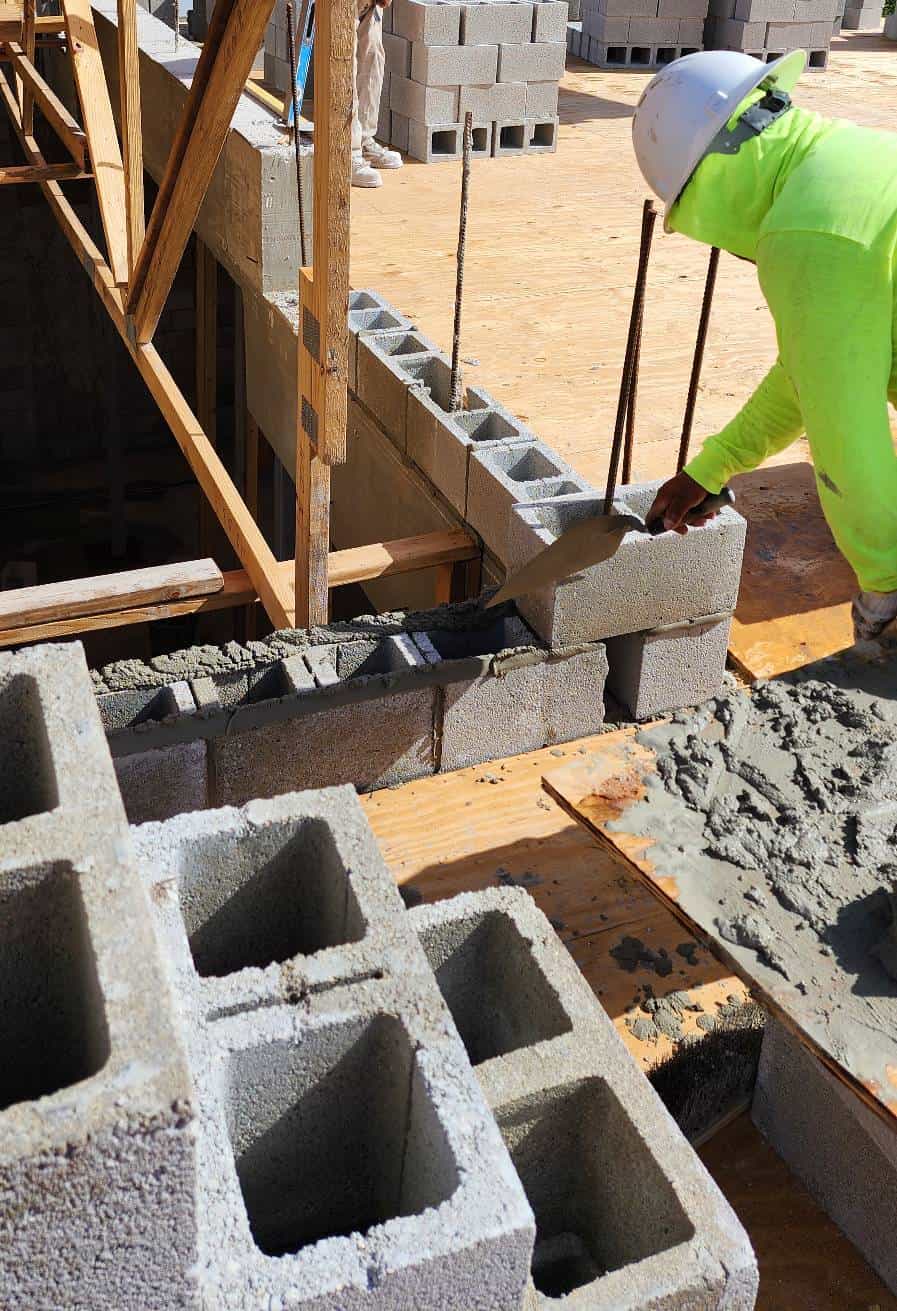
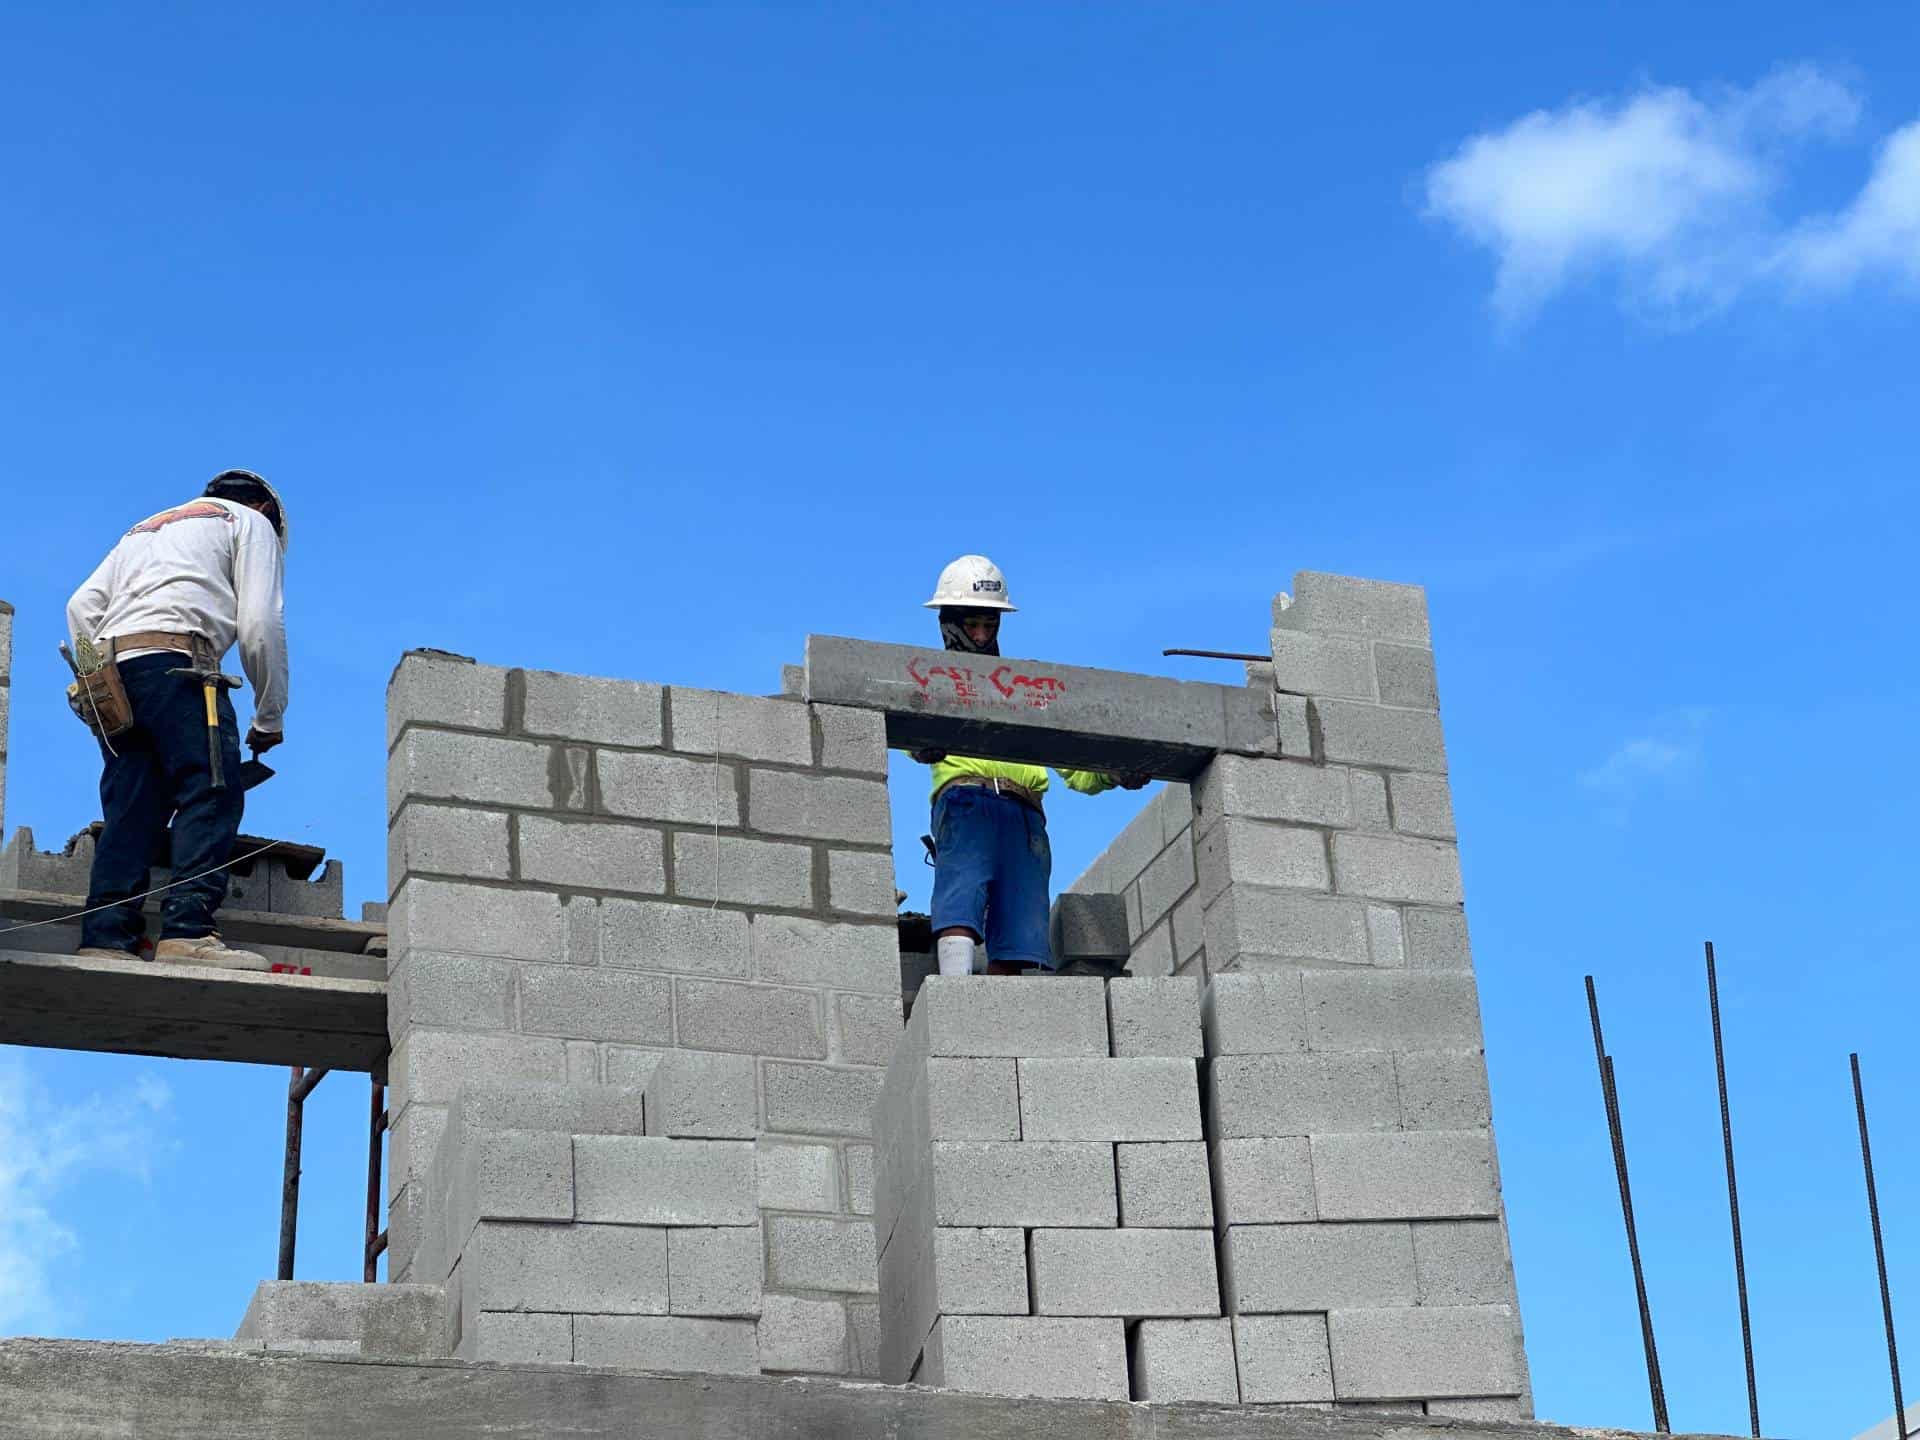
Block Is Laid In-Place
Each course of block is installed per plan specifications.
Reinforcing steel is seen peeking through the cells with the cleanout box below.
Horizontal joint reinforcement is installed every other course just like in the masonry on the first floor.
These elements were covered in Episode 2.
The video below has live-action of this taking place.
Close-Up
More about the parts that make up the masonry walls. Press photos to zoom in.
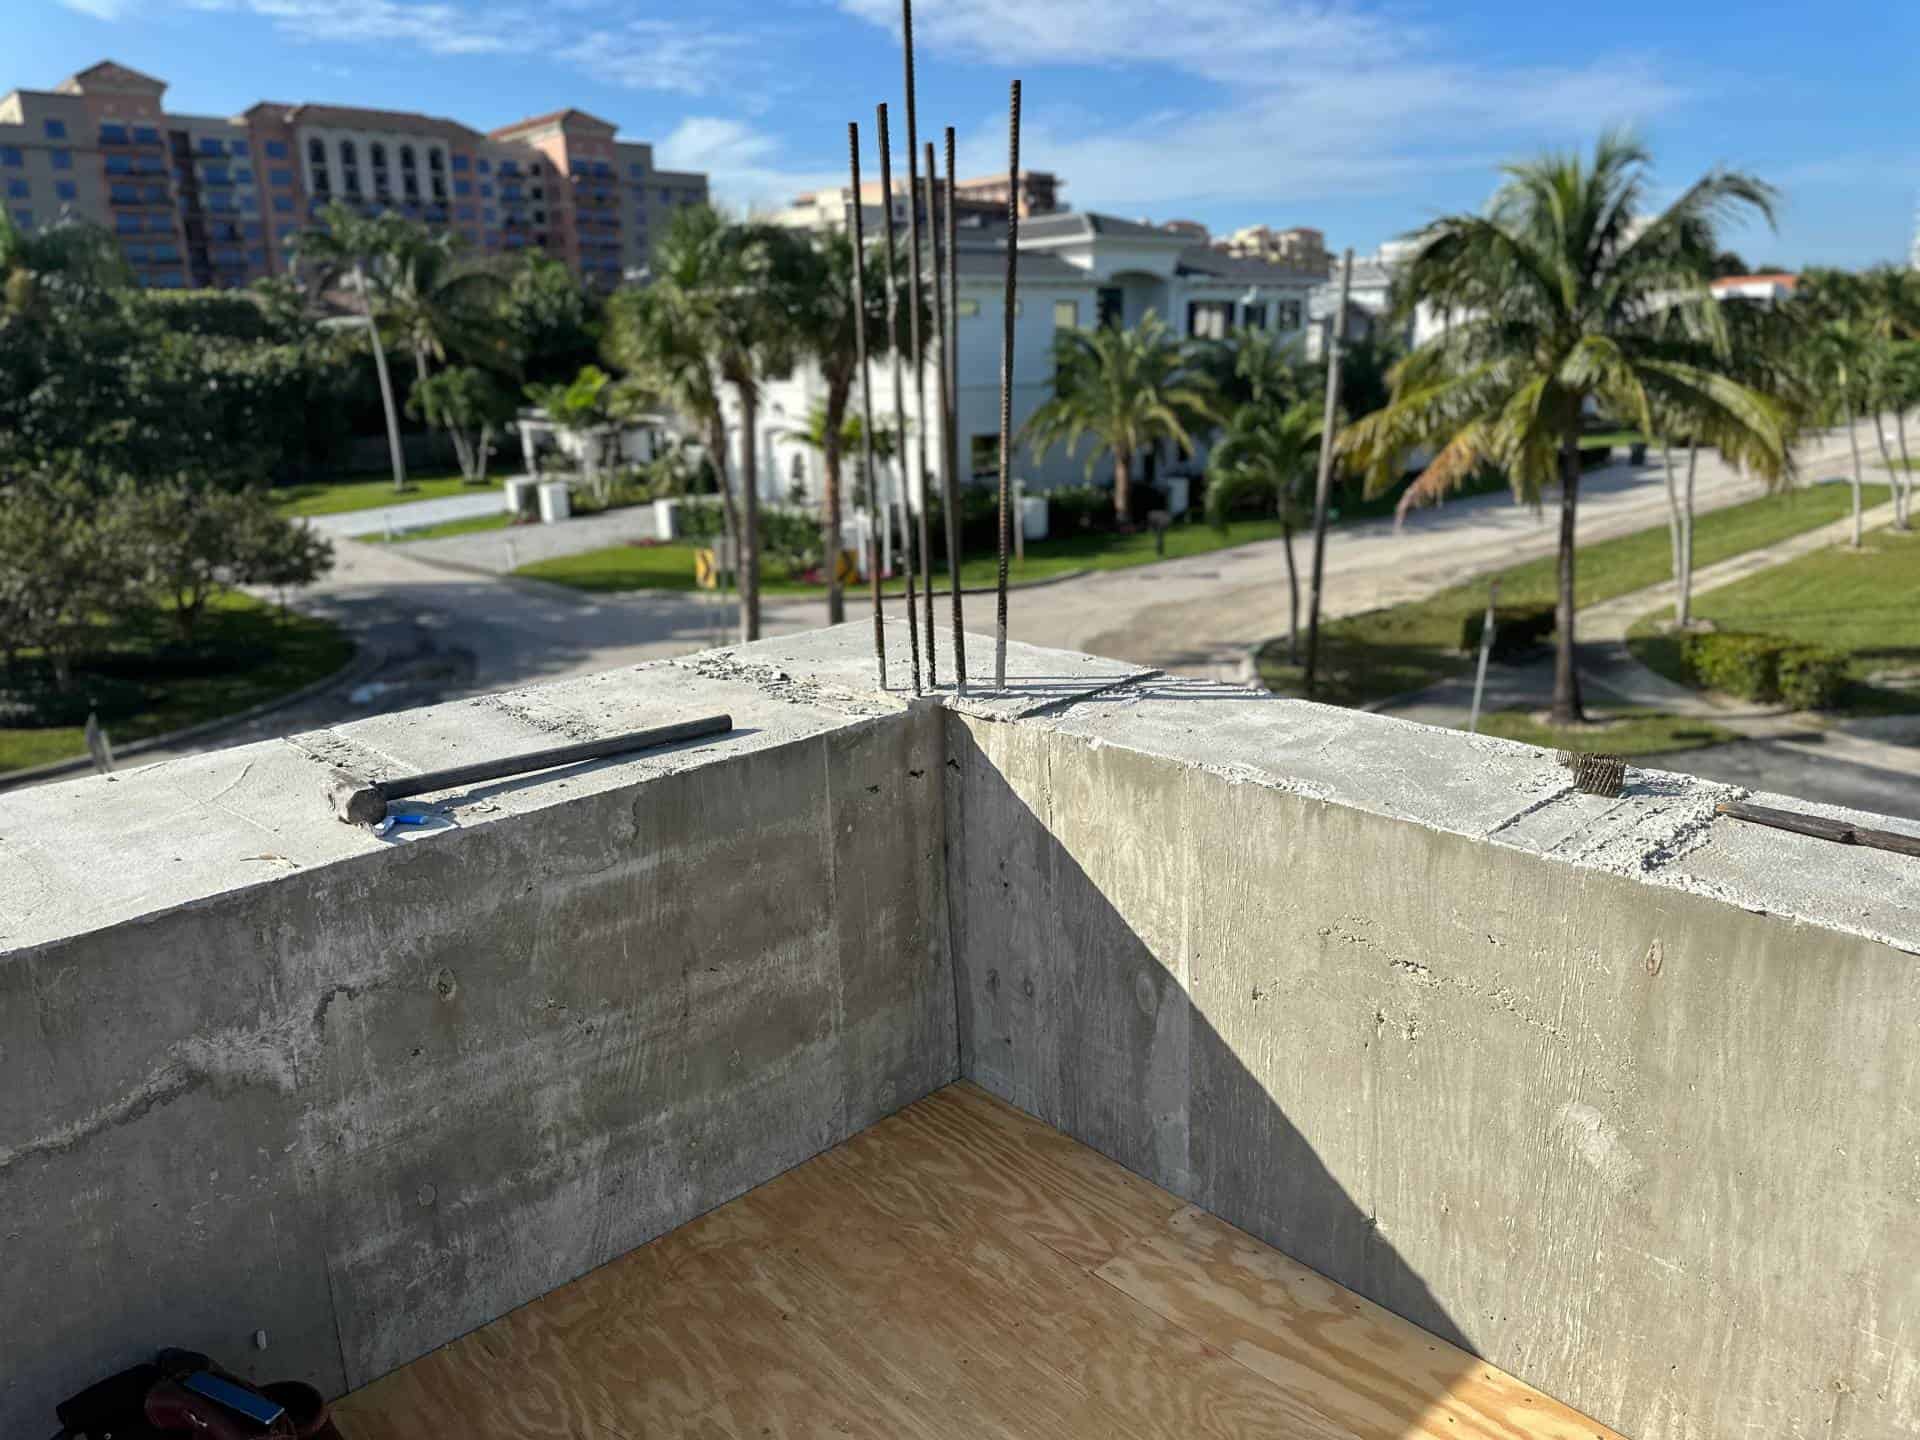
Vertical reinforcing steel is pre-formed into the first-floor tie beam, ready for masonry to be placed over & strengthen the masonry.
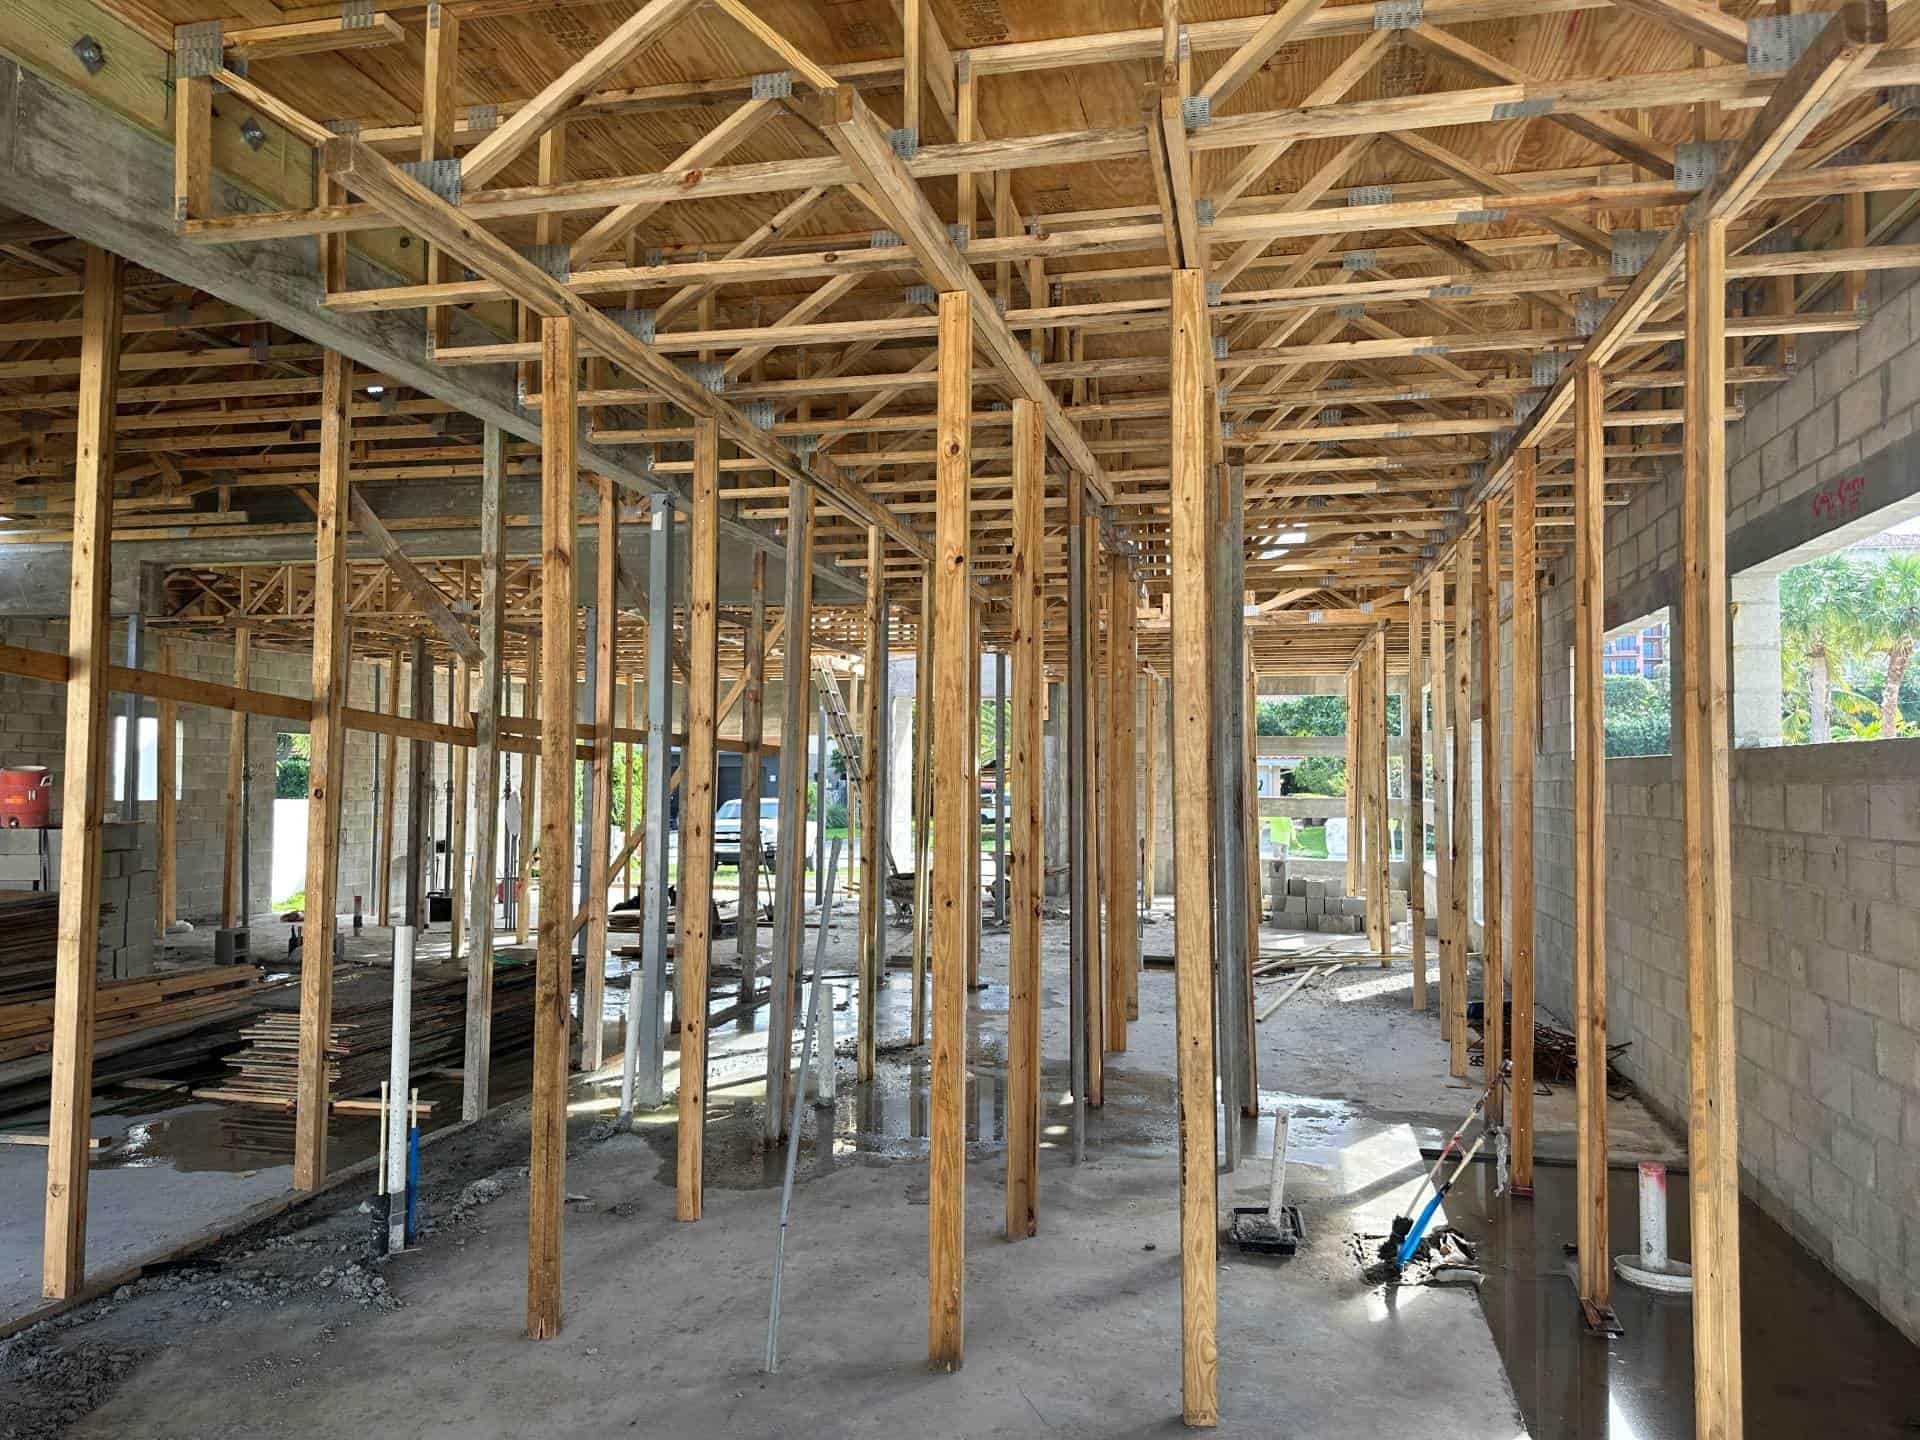
Wood shoring is placed throughout the first floor trusses to support the added weight of the masonry block. This is removed after installation.
Watch the video below to see the heavy block delivered by crane to the second-floor in preparation for the team to install the masonry walls.
Close-up of the bond beam delivered to the site to form the second-floor tie beam.
Learn more about that in the blueprint below.
Lintels form the beams above window & door openings on the first & second floors.
Learn more about that from Episode 2.
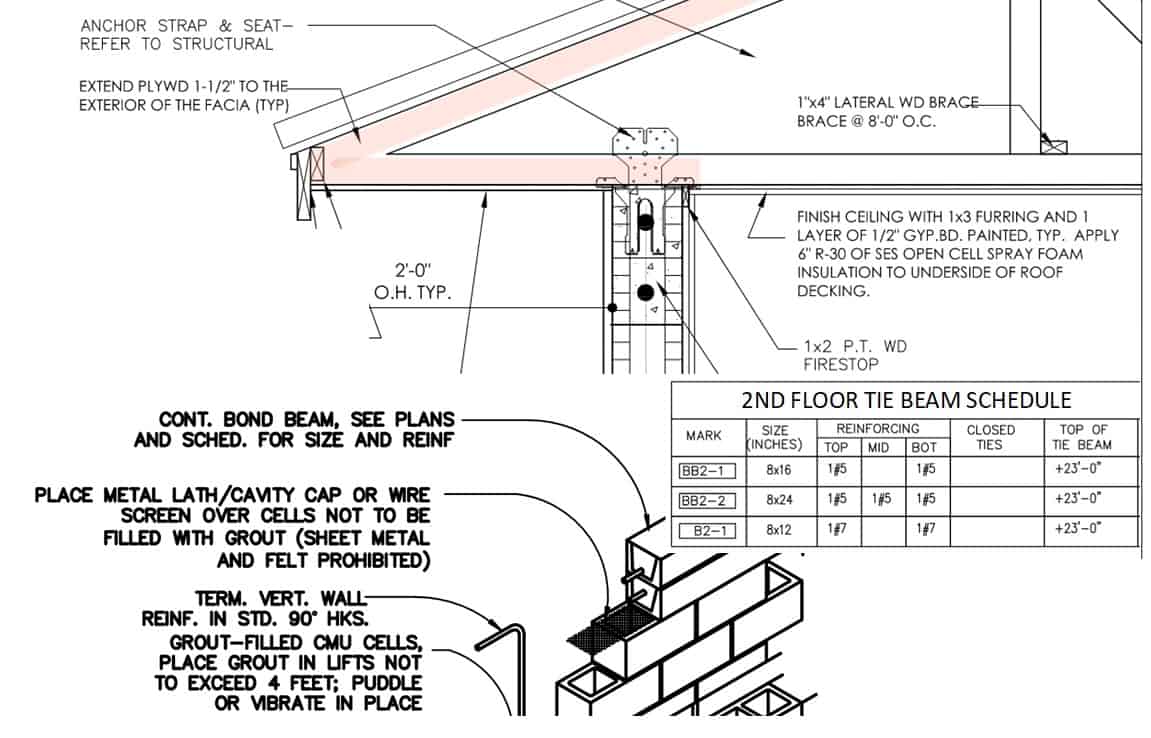
How It Looks On The Plans
The bond beam (BB2-1) is illustrated on the plans as (2) courses of block with (1) #5 in each cell. The steel sits in the knockout you see in the block photos above.
The plans also show a detail of the masonry to truss strap for high wind uplift. This was covered in Episode 5.
You can also see the trusses above which will be covered in an upcoming episode.
Clips From The Field
Watch stunning video captured from above & below during the entire second-floor masonry wall build.
Taking Shape
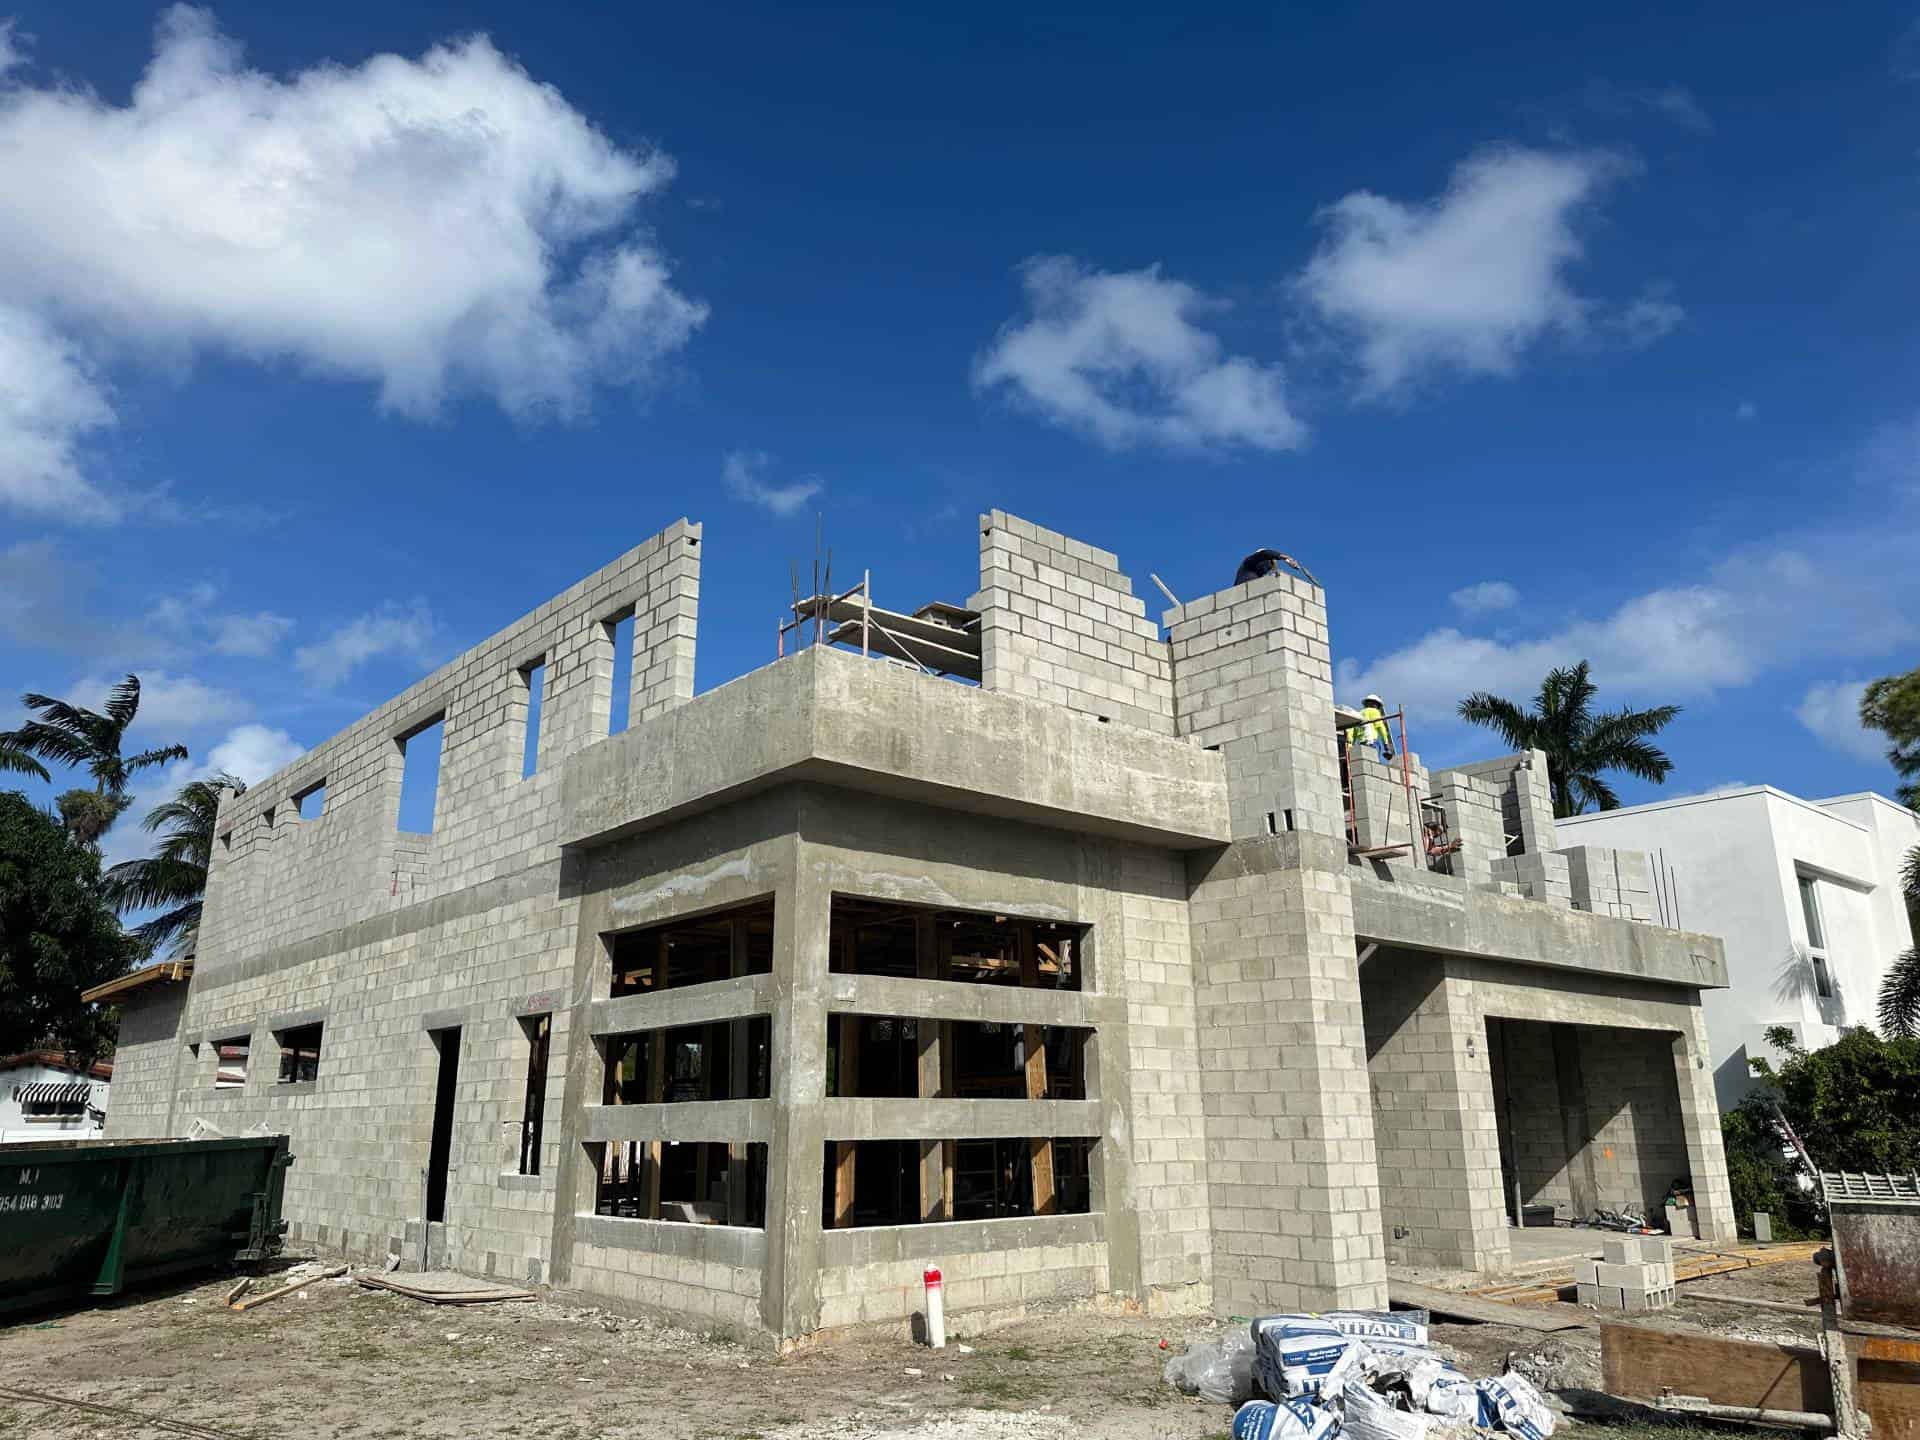
Here’s our first look at the left elevation of the house. With the masonry complete, you can now make out the openings & general finished shape.
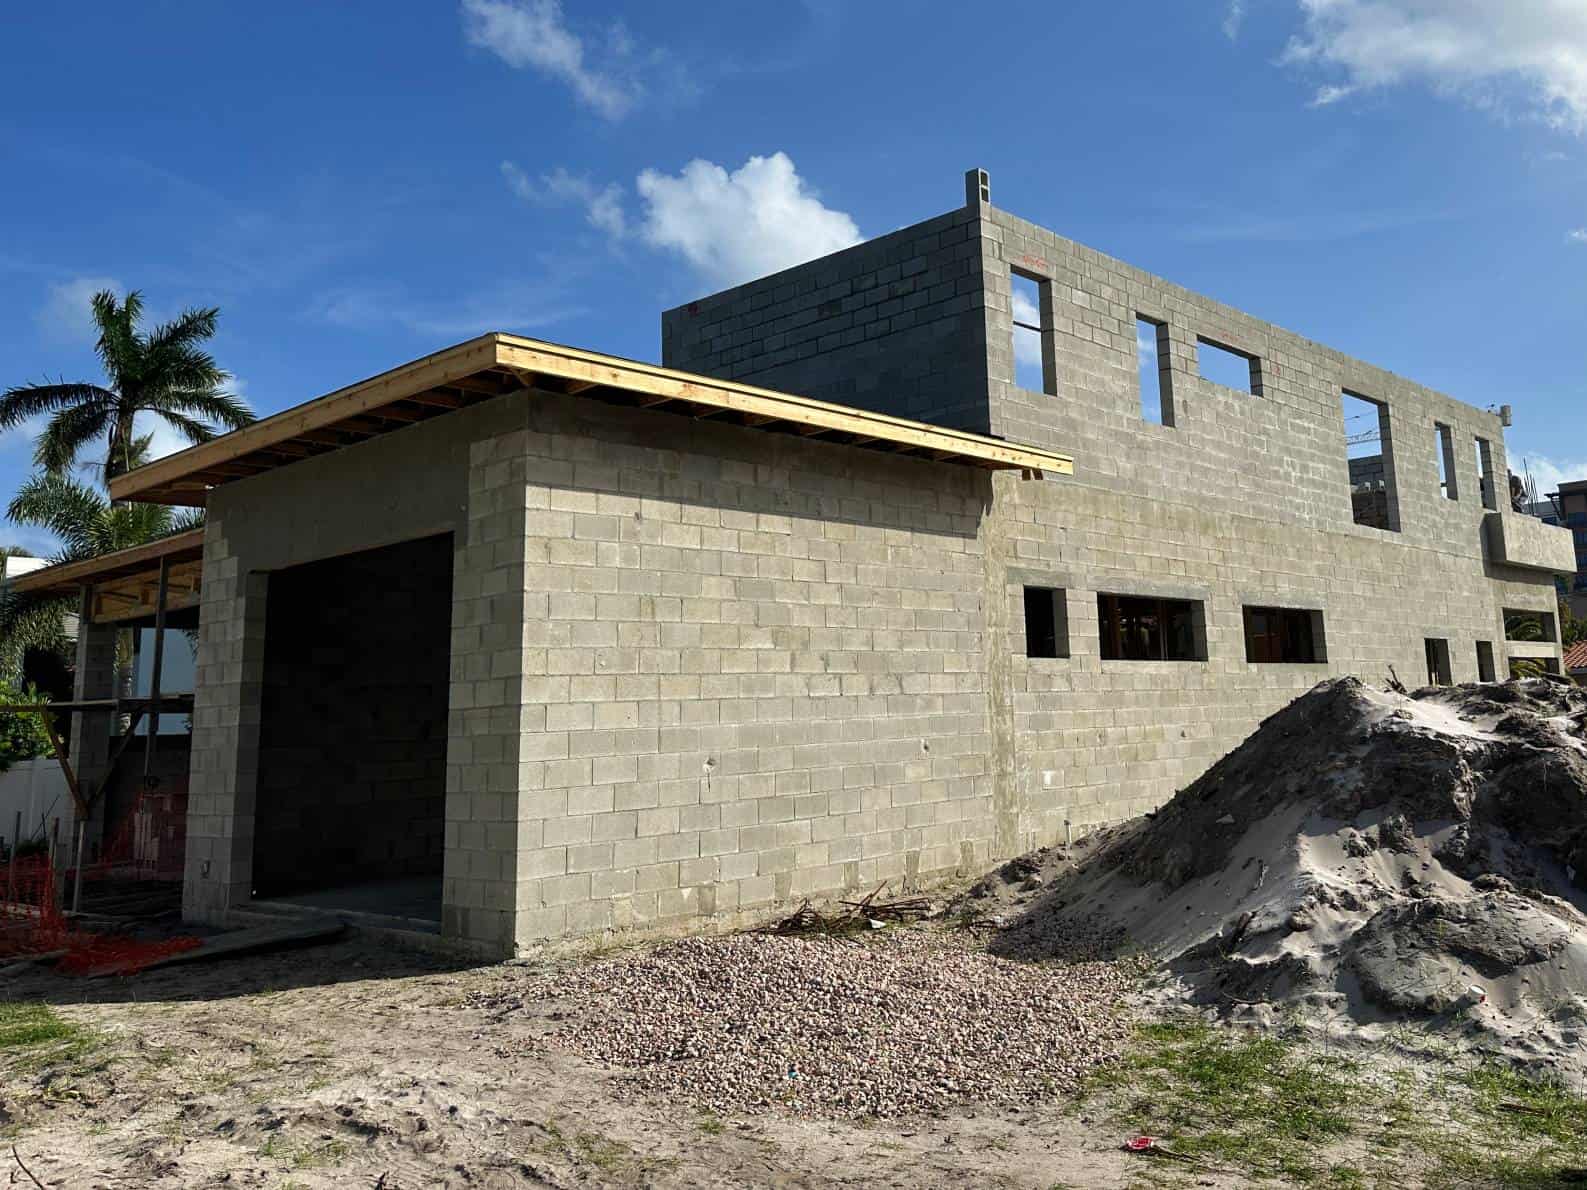
The (Nearly) Finished Masonry Product
With more still to frame out, the finished masonry aligns with the design plans.
We’re almost at the completion of the building ‘shell’, meaning the structure will be ready for windows, doors, & dry-in after the roof is installed.
Not so fast though, we’re not finished with this part of the project yet…
What's Next - More Forming & Pouring
Take a look at the photo & you’ll see the first floor has custom concrete beams to form out the corner windows.
Something similar will be formed & poured for the second-floor windows & poured when the masonry cells & bond beam is filled with concrete.
That’s covered in an upcoming episode.
Until then, explore plans from our gallery, or review other articles from our blog.
