
Don't Move That Column Before Understanding This
FOR THIS EXAMPLE
Let’s take a look at this typical need to move this interior steel loadbearing column in the kitchen of this two-story home.
This is a house built using wood floor trusses supported by a steel column on a concrete foundation on grade.
The column is being moved to create an open floor plan with symmetrical columns flanking the kitchen countertop.
FIRST STEPS
The first step is to find & review the original, permitted design plans. They will contain information regarding which walls are loadbearing, column sizes & locations, foundation & connections.
Regardless of whether you have the plans or not, exposing the area in question is critical to match up to the plans, or to use as a basis for your design modification.
Yes, it’s messy, but necessary.
Engineer A Plan
Your design professional will then assess the total weight (load) that column is designed to handle, and create a plan to support the truss above and foundation below at the new location.
KEY DESIGN POINTS
- The truss is ‘used to’ holding the weight in a specific location for a long time. Moving that reverses forces which can cause deflection issues, stress points, and long term cracking. In this example, the column was moved to an area over another vertical support and the both sides of the truss was covered, glued & screwed with 3/4″ plywood as shown in the plan.
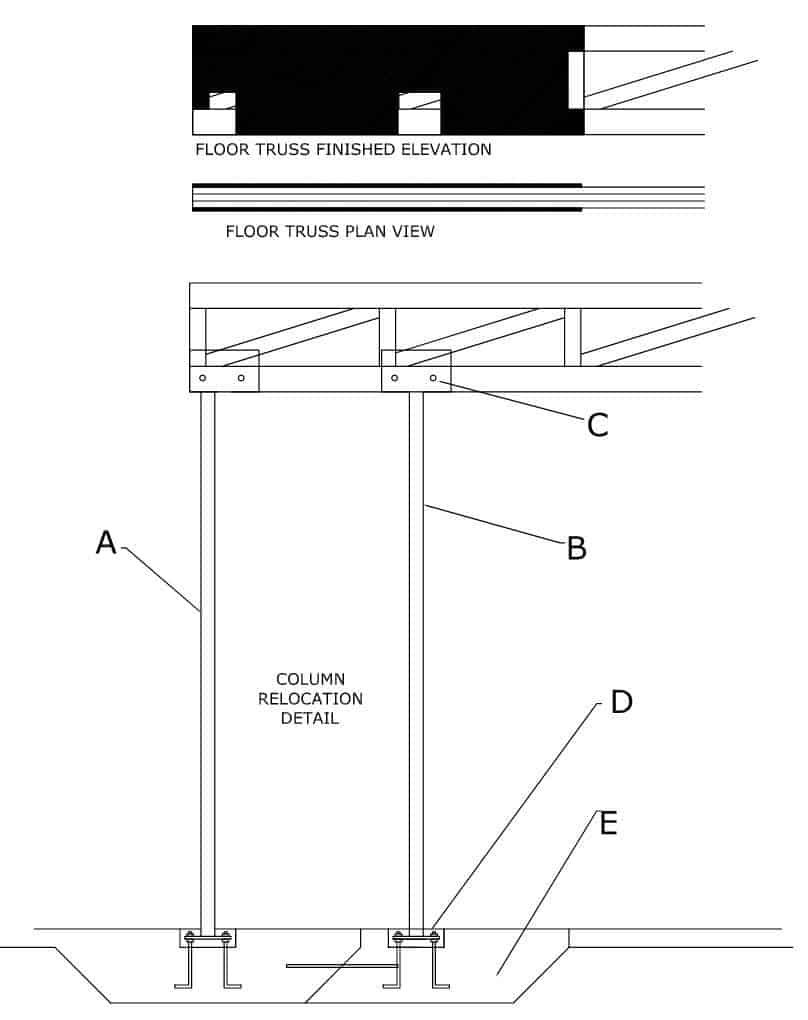
A portion of the engineering plan. The full set includes all the notes & details needed for permit & construction.
Click/press to enlarge.
- ‘A’ represents the original truss location in this sketch. Notice how it sits on top of a thickened area of the slab. This isolated footing is what distributes the column load to the soil below and prevents cracking of the slab.
- This has to be recreated for the new column ‘B’. An equal or greater size is recommended, ‘E’, attached to the original footing using steel reinforcing dowels shown.
- A similar steel bucket ‘C’ is specified to hold comparable gravity and uplift forces.
- Last, the new footing is created with a recess so the steel column baseplate can be hidden below the floor tile.
Read This
See steel columns installed in a new two-story house in this article from our Build-A-House Series.

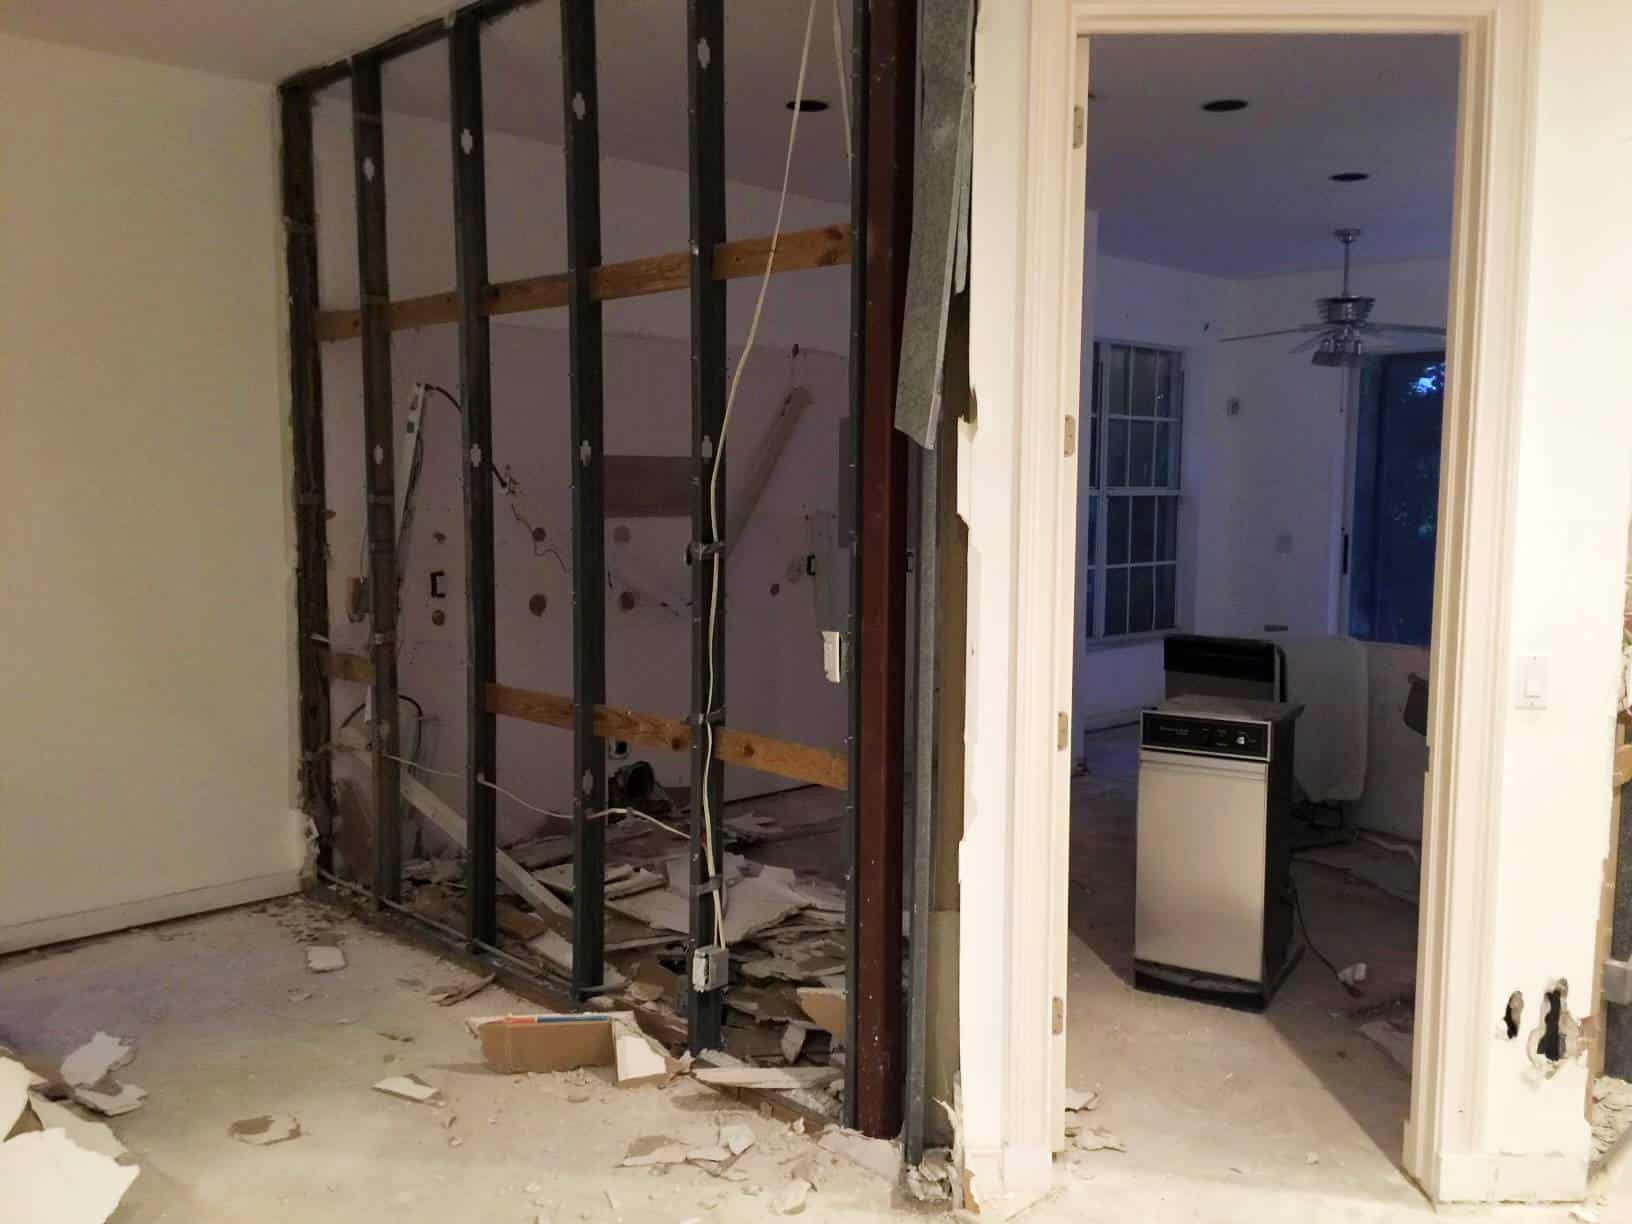
Close Ups
Photos from the project to illustrate the engineering plan above.

Visual of the floor trusses above the steel column.

A steel bucket seen from below, ‘C’ holding floor trusses above.
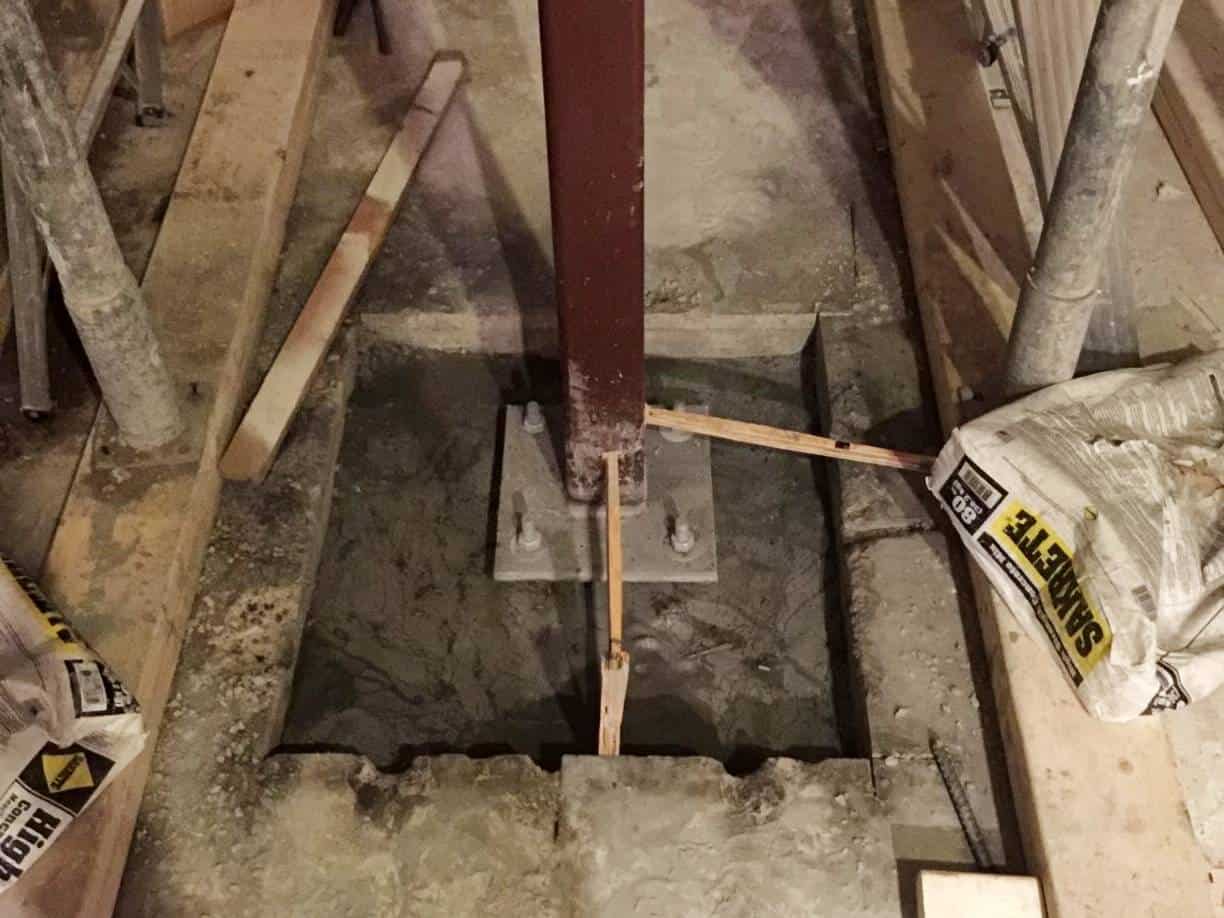
The new concrete pad was poured under the new column, and recessed to hide the column baseplate & anchors.
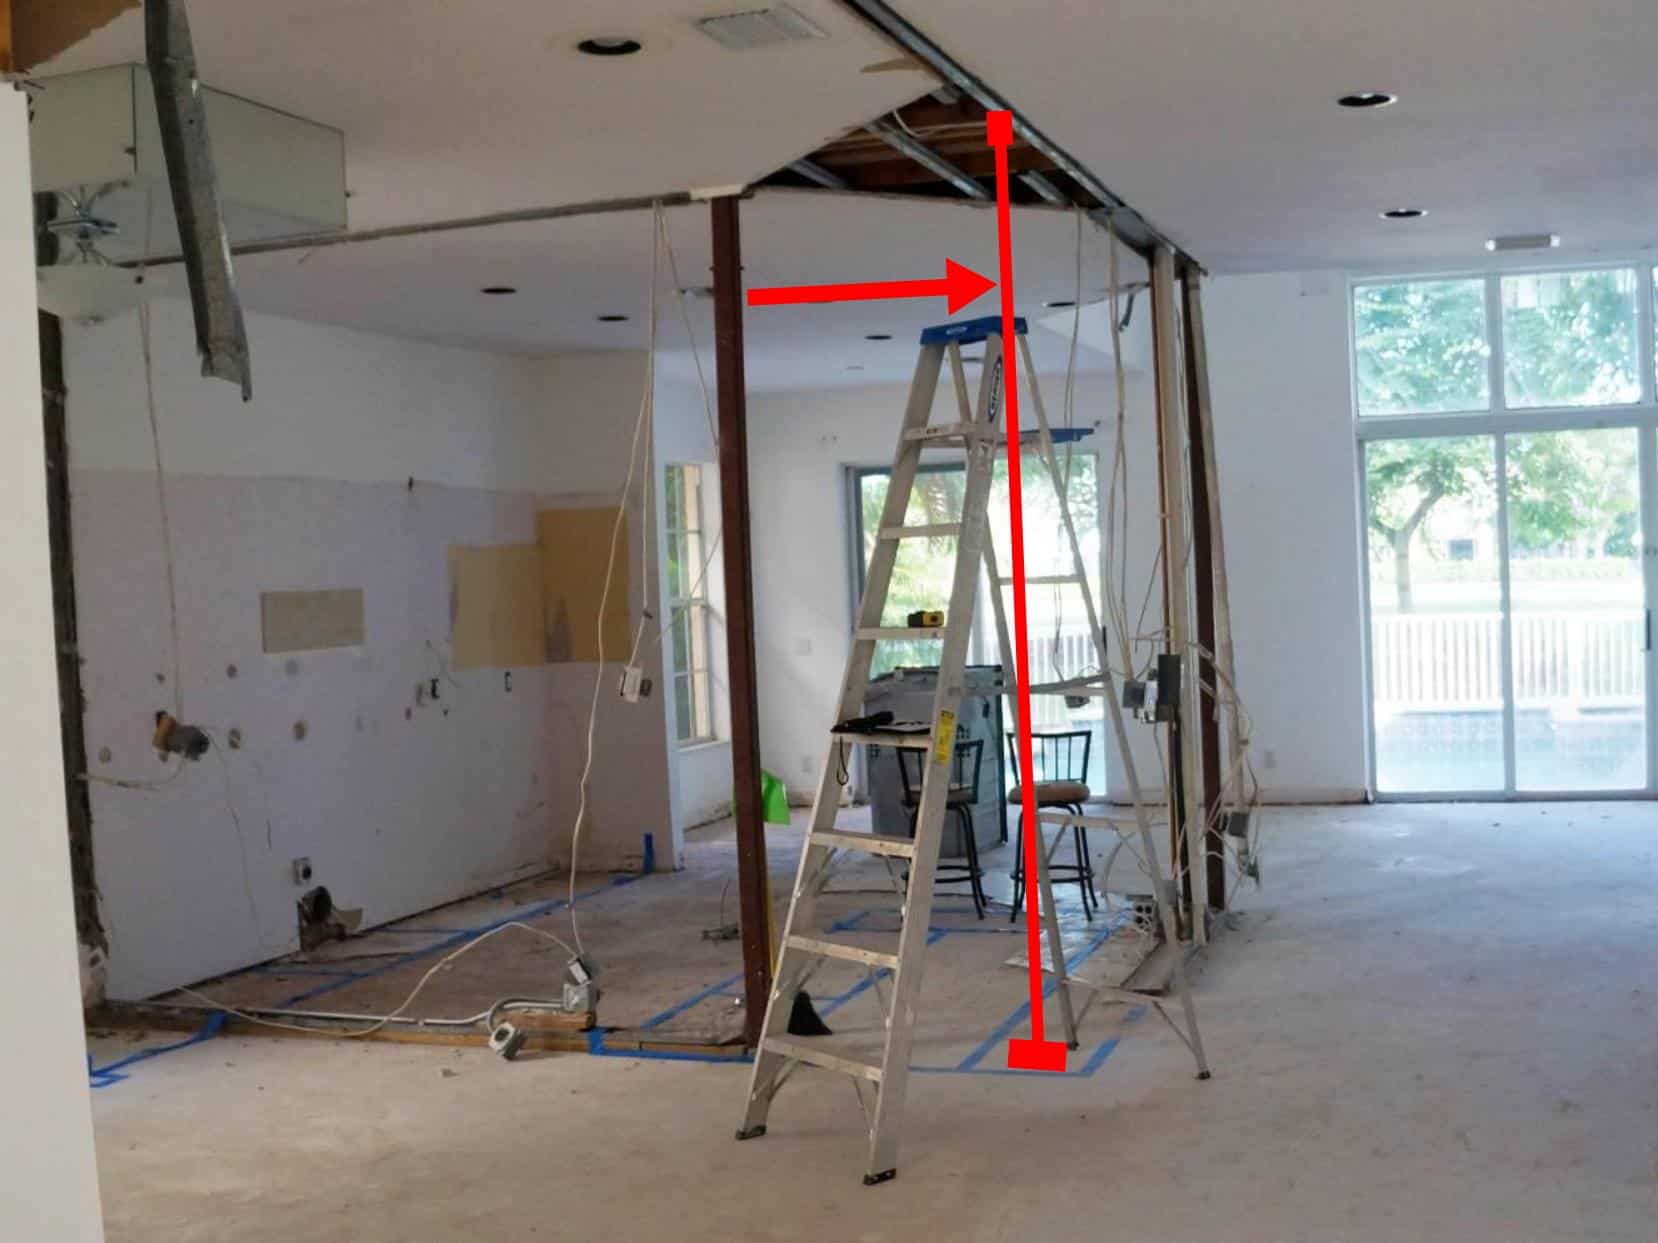
Shoring: A Very Important Thing

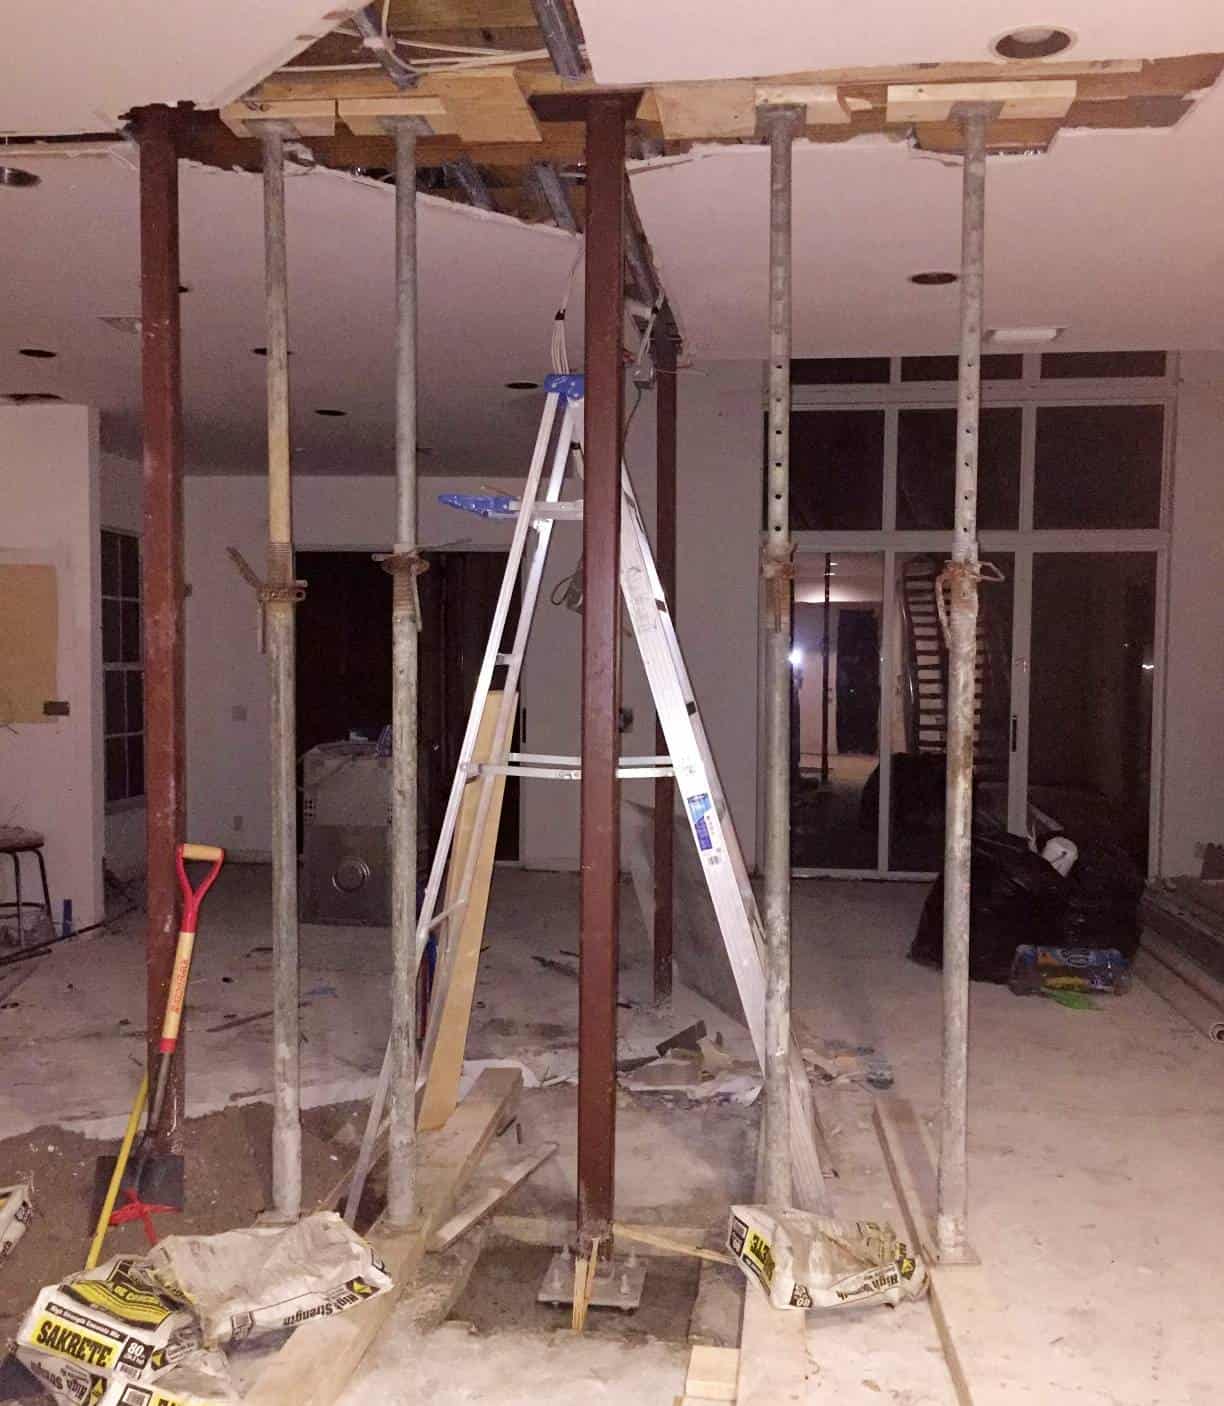
During construction, it’s critical the proper shoring be installed to maintain balance to the floor truss above & safety to the area below.
Shoring also helps ‘lift’ the floor truss ever so slightly, so the new truss can be securely seated into position without the truss dropping below it’s intended resting place.
Notice how the shoring columns sit on wood stringers. This distributes the weight across a larger portion of the concrete slab to prevent cracking and aid in securing the shoring in place from being accidentally bumped out of place.
Click / press on any of the photos to enlarge.
Clean Up & Decorate!
The last step after the new column is firmly in place is to carefully remove the existing column & shoring, ensuring that no movement is noted in the floor truss above. The contractor will re-install the shoring & reinforce the area if any trouble is noted.
After that, it’s time to install replacement drywall, flooring, wrap the column in a decorative finish & complete your kitchen renovation.

Photo of a similar project with a decorative column wrap to become a design feature of the room.


